Overview
Attributes evaluation
At render time, the RenderGraph is evaluated for each object of the scene, and the evaluated attributes are sent to the renderer, thus defining the rendering aspect of each object. The evaluated attributes are those that flow to the final output of the RenderGraph. Depending on the arrangement of the graph, these attributes can have different values for each object:

Cube is rendered with a Metal shader, which is a Surface shader with the Metal parameter set to 1
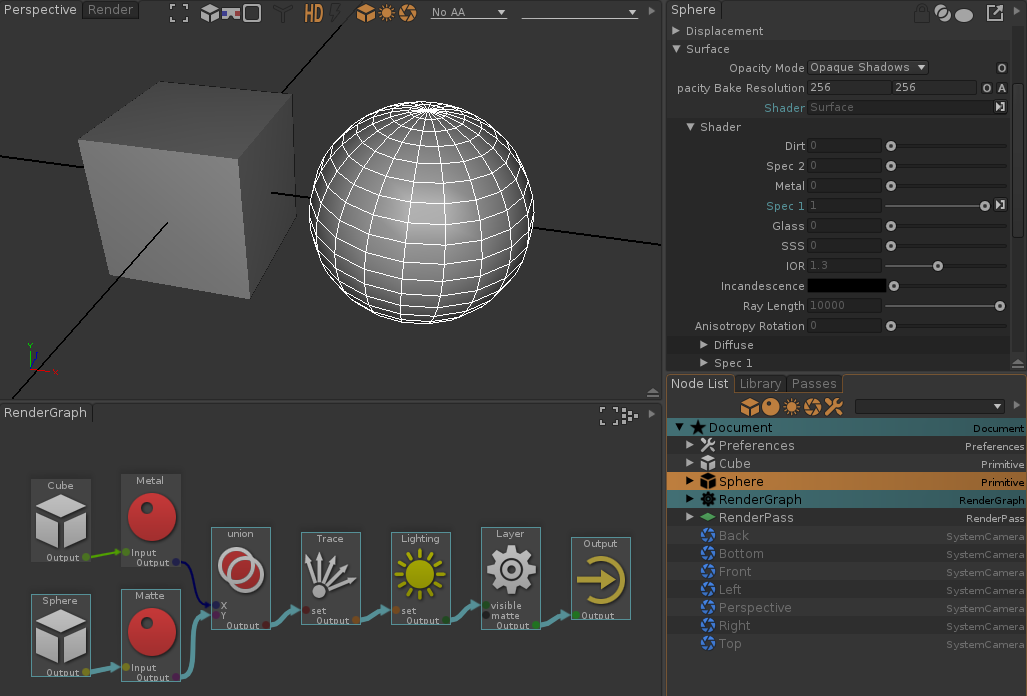
Sphere is rendered with a Matte shader, which is a Surface shader with the Spec1 parameter set to 1
When selecting an object of the scene, you can visually see from and through which nodes it flows, as highlighted in blue. This flow shows exactly how the RenderGraph is evaluated at render time for this particular object. This information is important to understand how an object is rendered.
When selecting an object of the scene, the property sheet displays the attributes which have been set in the RenderGraph with a blue header and a grey disabled control.

The Surface shader and the Spec1 have been overridden
Move the mouse pointer over an overridden attribute in the properties to see where it is
overridden. Shift+ will focus the origin node.


The Spec1 attribute of the Sphere is overriden by the Matte node
Alternatively, move the mouse pointer over a RenderGraph node to see which attributes it overrides for the currently selected object.
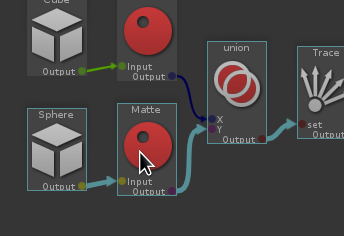

The Matte node overrides the Surface shader and the Spec1
Moving the mouse pointer over the RenderGraph nodes, you can inspect the attribute flow for the current selection.
In this example, the object 'Sphere' is represented by the RenderGraph node 'Sphere'. By selecting the object, we can see how it flows through the graph.
- First, it is selected by the 'Sphere' node of the graph. The path set in the node is 'Sphere', which matches 'Sphere'
- Then, it flows through 'Matte', which sets the surface shader to 'Surface', and 'Spec1' to 1. Up to this point, the object should be rendered with the Surface shader with some specular.
- Then, it flows through 'union'. This node merges both its inputs into a single flow. Since the X input is not flowing, the merge operation simply copies the Y input into the Output.
- The 'Trace' node adds the Diffuse, Reflection and Refraction sets to the flow so the object is raytraced in diffuse, reflections and refraction.
- The 'Lighting' node adds the Lights and Shadows sets to the flow so that the object is illuminated by all lights, and cast shadows in all lights.
- Then, 'Layer' says that the object is visible in the render layers called 'Layer'
- Eventually, the flow reaches 'Output'
Since a RenderGraph is a node of the scene in itself, it can be easily duplicated, and replicated from a scene to another, making it a very powerful way to improve the workflow over several scenes.
- Create a RenderGraph using 'Menu bar > Create > RenderGraph' or '
 > Create > Create RenderGraph' in a Browser or Node List view.