Render Settings
The render settings include a lot of parameters to globally control your render.
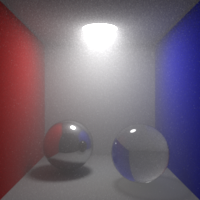
Samples
Number of rays to be shot by the raytracer for every pixel.
Camera Samples
The number of rays shot from the camera, to determine the primary visibility
This value equals
Direct Samples
The number of rays shot towards lights at each bounce, to determine the direct lighting
This value equals
Indirect Samples
The number of rays shot for bounces, to determine the indirect lighting
This value equals
Size
Use Project Settings
Connects the image settings to the project settings, see
Width
Width of the image, in pixels.
Height
Height of the image, in pixels.
Aspect Ratio
Aspect ratio of the image.
File
Write Images
Writes the images of the pass during a local render (CTRL+R or "Local" render). During a batch or a farm render, the images are always written.
File Pattern
Pattern used to create the name of the output file. The pattern can contain $# items which are replaced by the following:
- $l is the RenderPass path (including prefix and hierarchy)
- $L is the RenderPass name (excluding prefix and hierarchy)
- $n is the RenderLayer name
- $o is the Output name
- $e is the eye number (1 for the leftmost)
- $E is the eye name (as 'left' and 'right')
- $c is the camera name including prefix
- $C is the camera name excluding prefix
- $x is the default display extension (exr, tiff, etc.)
- $f is the frame number ($03f is frame number 0-padded to 3 digits)
File
Preview of the final filename in wip mode, for the first output, frame 666 and the eye #1.
Layer Pattern
Pattern used to create the name of the layer inside the file, when supported.
When rendering in exr files or supported formats with layering, this value is used to control the name
of the produced layers. You can use specifiers like $f, $e, $x, etc, like in $l_$n_$o. The default value is $n_$o.
File Format
The file format of the output image.
- Tiff : write a tiff file. This format support 8 bits and float pixels. It applies a gzip like lossless compression.
- Targa : write a Truevision TGA file. This format support the 8 bits pixels. It is not compressed.
- Png : write a Portable Network Graphcis PNG image. This format support the 8 bits pixels. It applies a gzip like lossless compression.
- OpenEXR : write an OpenEXR file. This format supports the half float and float pixels, layers and deep images. It includes various compression schemes.
- OpenEXR/Id : write an OpenEXR/Id file. This format supports the half float pixels. A dedicated reader is needed to read the image in the compositing software. Using this format, one can isolate any object in the image.
Write Deep Image
Write a deep image. A deep image contains multiple pixel colors in depth. Only for the OpenEXR format.
Those images can be very large if not carefully compressed.
Deep Image Compression Ratio
Controls the lossy compression of the deep pixels. 0 means no compression, 1 means maximum compression. In all cases, the result of the flatten image is lossless. Only for the OpenEXR format in Deep Image mode.
Deep Image Merge Flag
Allow to merge the fragments from different objects in the same deep fragment.
Multi Part
If checked, writes the AOVs as OpenEXR 2.0 multi-part files. If not checked, writes the AOVs as channels (compatible with OpenEXR 1.0). Only for the OpenEXR format.
Meta Data
The meta data to insert in the EXR file header. You can add a metadata per line. Here is an exemple of two meta data :
key1=value1
key2=value2
Pixel Format
Pixel format of the image.
- RGBA : the red, green, blue and alpha channels are written in the file.
- RGB : the red, green, blue channels are written in the file.
- A : the alpha channel is written in the file.
Depth
Bit depth of the image.
- 8 bits : the color components are quantized on 256 values. This produces the smallest files, with the smallest color precision. The color values are clamped between [0.0, 1.0]. 8 bits colors should be written using a sRGB gamma.
- Half float : the components are stored in a half float (16 bits) which is a good choice for the color channels. No clamping. Only for the OpenEXR format. This mode is not precise enough for texture coordinates (st), positions (P) and depth (Z) AOVs, choose Float for those.
- Float : the components are stored in a float (32 bits) which is the highest quality you can get. No clamping. Only for the OpenEXR and Tiff formats.
Compression method
The OpenEXR compression algorithm.
- None : no compression.
- RLE : run length encoding.
- Zips Lines : zlib compression, one scan line at a time.
- Zips Blocks : zlib compression, in blocks of 16 scan lines. The default compression method.
- Piz : piz-based wavelet compression.
- PXR24 : lossy 24-bit float compression.
- B44 : lossy 4-by-4 pixel block compression, fixed compression rate.
- B44A : lossy 4-by-4 pixel block compression, flat fields are compressed more.
File Alpha Mode
Indicate if the colors are written multiplied by the opacity in the file.
In all cases, the alpha channel is written with the opacity left untouched.
- Unpremult/Unassociated Alpha : Write color independently of the opacity.
- Premult/Associated Alpha : Write color with the opacity multiplied.
Gamma
Indicate the LUT to apply to the output image.
The default value uses the project's gamma. For 8 bits images, you may want to use a
Backup Project File Name
The name of the backup gproject file to be saved along rendered images.
When rendering images in batch or farm, Guerilla can save a file along with each active Layer.
This option is useful if you want to keep a track of the setup that is the source of the rendered
image. This value accepts $l and $n specifiers. When left empty, no file is saved.
Image Sampling
Pixel Width / Pixel Height
Jitter
Enables jittering of the samples position in the pixel. Jittering replaces pixel aliasing by noise which is less noticeable.

Time Jitter
If checked, change the jitter pattern at every frame.
Motion Blur
Globally enable or disable the motion blur.
Motion Blur Density
Change the shape of the motion blur.
Depth of Field
Enables compute of the depth of field.
Bokeh Bitmap
Specifies the bokeh luminance bitmap used to control the bokeh distribution.
Pixel Filter
Filter
The filter to use to reconstruct the final image.

X Width
Width of the filter, in pixels. 1 is the ideal size regardless the filter type. A value larger than 1 will blur the image, a value smaller than 1 will produce a sharper image.
Y Width
Height of the filter, in pixels. 1 is the ideal size regardless the filter type. A value larger than 1 will blur the image, a value smaller than 1 will produce a sharper image.
Clamp Pre Filter
Clamp the sample values. Try [0,10] or [0,5] to remove fireflies. If both values are equal, no clamping is done.
Clamp Post Filter
Clamp the pixel values. If you want to output positions, normals or any other non ranged values, you should reduce the min value to a negative value (like -10000). Set range minimum to 0 to avoid negative values in colors, due to ringing filters, for instance.
Mitchell Parameters
Mitchell filter B and C parameters.
Shading
Direct Sampling
Global multiplying factor for the direct lighting sampling.

Indirect Sampling
Global multiplying factor for the indirect lighting sampling.
Max Bounces
Global maximum raytracing depth. This value clamps the value contained in raytracing nodes.

Diffuse Bounces
Maximum number of diffuse bounces. This value can be individually overriden in the shader properties.
Specular Bounces
Maximum number of specular bounces. This value can be individually overriden in the shader properties.

Refraction Bounces
Maximum number of refraction bounces. This value can be individually overriden in the shader properties.


Volume Bounces
Maximum number of bounces in volumes. This value can be individually overriden in the shader properties.
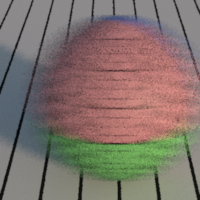
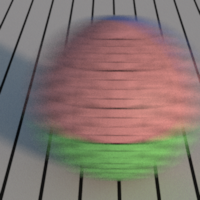
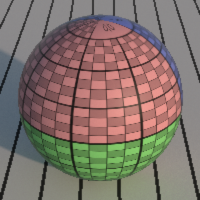
Shading Blurriness
Control the shading blurriness, in pixel area.
Smaller values mean finer texture lookups but greater memory usage.
Ray Filter
Changes the allowed ray path. This value can be individually overriden in the shader properties.

Light Importance
Weighting of the direct lighting according to the intensity and distance. This option tells the renderer to give more importance to brighter and closer lights. 0: all lights are considered equivalent, this improves the quality in shadowed areas. 1: the lights are weighted according to the brightness and distance to the shading point, this improves the quality in illuminated areas.
Stereoscopy
Stereo Viewpoints
One Pass Stereo
Enables stereoscopic viewpoints to be rendered in one single pass. If checked, allows to render all viewpoints in one single pass. If unchecked, forces to render all viewpoints separately.
Force Eye
Force the rendering of a single eye.
Performances
Denoiser
The denoiser to use. If "None", no denoising. "Default" is an internal experimental denoiser.
Altus Command Line.
The command line used to run the altus denoiser.
Altus Only Files.
Save the file images for Altus but don't run the altus denoising.
Performances
Bucket Size X
Width of a rendering bucket, in pixels. Decreasing this value can save some memory during the rendering, but will increase the render time.
Bucket Size Y
Height of a rendering bucket, in pixels. Decreasing this value can save some memory during the rendering, but will increase the render time.
Bucket Order
Changes bucket rendering order.
Opacity Threshold
Amount of accumulated opacity to be considered fully opaque. Decreasing this value reduces memory consumption and rendering time for scenes with large number of semi-transparent objects, such as hair or volumes.
Max Opacity Depth
Maximum number of accumulated hits through a ray with opacity. This value controls the maximum number of semi-transparent layers the raytracer will accumulate. Above this count, the ray is considered culled. Increasing this value may resolve early depth culling at the cost of rendering time.
Ray Batch Size
Maximum number of rays to be shaded simultaneously.
Thread Texture Count
Number of texture tiles held by rendering thread. This value controls how many texture tiles are kept in active memory by each thread. Higher values mean faster rendering, but higher memory usage. Note that actual texture memory is not duplicated across threads, but rather forced to stay resident in memory instead of being flushed.
Light Selection
Enable the light selection accelerator.
Auto Build Textures
Enable automatic building of .tex files.
Debug
Shader Optimizer
Control the shader optimization levels for speed versus memory consumption.
"None" : Disable any optimization on the parameters, produces less optimal shaders, but consumes less memory
"Default" : Optimize only default parameters, which consumes some memory
"All" : Optimize all parameters, which consumes even more memory (compilation time is also increased)
Opacity Optimization
Control the constant opacity/opaque optimization.
Default Surface Color
Surface color to use when a primitive has no surface shader nor suface color.