Hair2
You can also use the Hair2 material to render hair, fur and curves. It is more physically-based than the previous Hair material, and is currently considered experimental. The appearance of a hair volume is the result of complex light paths, with light often bouncing through many hairs before exiting the hair volume. It is thus advisable to allow a high number of bounces, or use multiple scattering approximation to avoid energy loss.
Tweak the following sliders to see the aspect of each lighting contribution (note that these are not parameters of the material but intensities of the front, back and environment lights):
Optical properties of hair fibers
IOR
Optically, a hair fiber is basically a tinted and frosted glass cylinder. The physical index of refraction is 1.55, but you may experience with different values for artistic purposes. With a low index of refraction, light deviation from refraction will be very low, leading to a uniform aspect; on the contrary, higher indices of refraction will deviate light more across the fiber's diameter, and as a result will let more light in from outside the hair volume.
Roughness
Roughness is controlled though two distinct parameters.
Default values (0.3/0.3) are typical of human hair. Animal fur usually has higher roughness values (particularly azimuthal roughness).
Scales Angle
A hair fiber is not a constant cylinder, but consists of slightly tilted scales layering on top of each other from root to tip. This parameter lets you control the angle of these scales. You may use it to shift the primary highlights off the ideal specular direction.
Color
You can specify the hair color in many ways :
- Using the
Albedo attribute, a simple RGB color. - Using the
Melanin attributes to control the hair melanin density, to get plausible human hair colors. - Using the
Absorption attribute with mesured RGB absorption values.
You can also :
- Modulate the color from the tip to the root using the
Tip/Root Color attributes. - Randomize the hair color per clump or per fibers using the
Clump HSV and Fiber HSV attributes. - Add mutant hairs, like white hairs, using the
Mutant attributes.
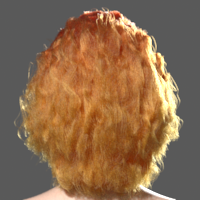
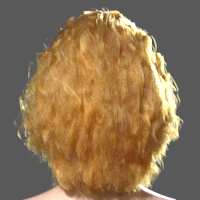
All of these controls are provided as a convenience and are internally combined together to compute the actual absorption coefficient. Most of the illustration pictures below use a base hair color defined through albedo (0.2938, 0.141, 0.0192).
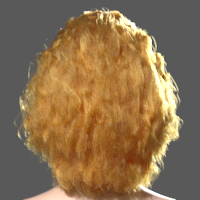
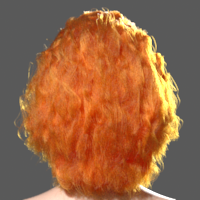
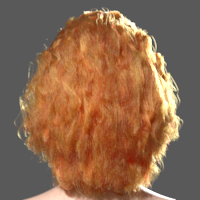
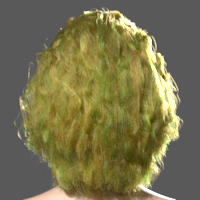
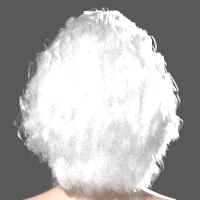
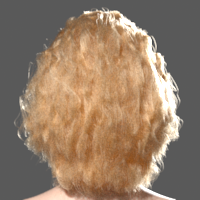
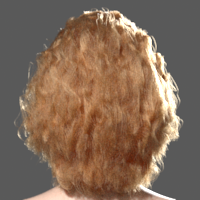
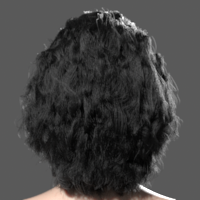
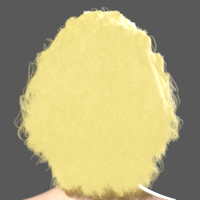
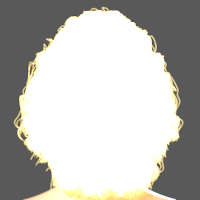
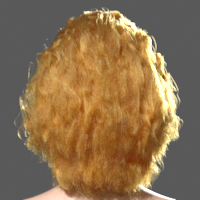
Albedo Color
 |
 |
 |
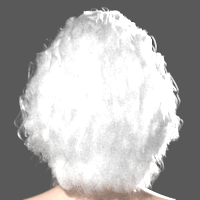 |
| (0.2938, 0.141, 0.0192) | (0.4, 0.0856, 0.0027) | (0.84, 0.6328, 0.2444) | (1, 1, 1) |
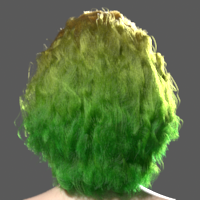
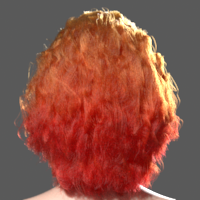
Root/Tip Color Modulation
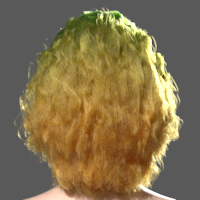
Clump Hue/Saturation/Value Randomization
Fiber Hue/Saturation/Value Randomization
Fiber Mutant Color
Mutant -> Ratio = 0 results in no mutated fibers,Mutant -> Ratio = 0.5 results in half mutated fibers, andMutant -> Ratio = 1 results in all fibers mutated.
Melanin Absorption
Similarly to
To render the hair with a specific melanin density, set
Absorption
To render the hair with a specific absorption, set
Incandescence
Absorption Factor
All the aforementioned parameters are combined together to compute the absorption value.
Hair density, roughness, opacity, lighting... interfere with this computation, and these color
controls may not provide the expected result. The
Opacity
Opacity controls the opacity of fibers.
Opacity
Tip Fade
Shadow Opacity
Scattering
When encountering a hair fiber, light can be reflected off the hair surface, or enter the fiber where it will be partially absorbed. There, it may be immediately transmitted out of the hair fiber, or reflected internally a few times before being transmitted out. The model we use allows for separation and modulation of these scattering events. You can use these parameters to strengthen primary reflection, backscattering... Note that these parameters control the contribution of scattering lobes for all hits, not just the primary.
Tweak the following sliders to see the contribution of each component:
Multiple Scattering
This hair model is built for best quality, and may require many light bounces to achieve good results with energy conservation. If rendering speed is an issue, you can activate the Multiple Scattering approximation. This tradeoff allows to get significantly faster results at the expense of image quality. You may even use the complete, more expensive model for the first few bounces, and then fallback to Multiple Scattering.
To activate it, use
Parameter
Parameter
 |
| Bounces | 0 | 1 | 2 | 3 | 5 | Reference (dual scattering off) |
| Render Time | 3 min 12 | 5 min 59 | 9 min 29 | 12 min 25 | 16 min 17 | 25 min 46 |
Dual scattering (the implementation of multiple scattering in the context of hair)
approximates global illumination in hair by separating direct/indirect illumination and
light coming from the front/back directions. Dual Scattering introduces some material
parameters of its own to fine tune the rendering:
Advanced
Trace Set
Specify the raytracing set for direct and indirect lighting.
Ray Length
Controls the maximum ray length for bounces. Shorter values result in less indirect illumination and shorter rendering time.
References
[Marschner03] "Light Scattering from Human Hair Fibers", Stephen R. Marschner, Henrik Wann Jensen, Mike Cammarano, Steve Worley, Pat Hanrahan
[Zinke08] "Dual Scattering Approximation for Fast Multiple Scattering in Hair", Arno Zinke, Cem Yuksel, Andreas Weber, John Keyser
[d'Eon11] "An Energy-Conserving Hair Reflectance Model", Eugene d’Eon, Guillaume Francois, Martin Hill, Joe Letteri, Jean-Marie Aubry
[d'Eon13] "Importance Sampling for Physically-Based Hair Fiber Models", Eugene d’Eon, Steve Marschner, Johannes Hanika
[Pekelis15] "A Data-Driven Light Scattering Model for Hair", Leonid Pekelis, Christophe Hery, Ryusuke Villemin, Junyi Ling
[Chiang16] "A Practical and Controllable Hair and Fur Model for Production Path Tracing", Matt Jen-Yuan Chiang, Benedikt Bitterli, Chuck Tappan, Brent Burley
[Pharr16] "The implementation of a Hair Scattering Model", Matt Pharr
The hair model is provided by Cem Yuksel, and can be downloaded at http://www.cemyuksel.com/research/hairmodels/.