Assigning materials
Using master Shaders
A master Shader contains either a surface/volume shader or a displacement shader, or both. Materials can range from physically plausible models to the most simple ones that just return a plain color.
The Guerilla library contains 3 main shaders, Surface, Curves and Displacement. See the Library documentation for more information on those materials.
The Shaders are assigned to a RenderGraph flow.
- Go in the RenderGraph node network.
- Create a shader using the node picker (Ctrl+Space then type the node name you want, like 'surface', 'displacement', etc..)
.. or select a node in 'Library > Materials' - Insert the node in the flow by draging it over a connection (the mouse cursor should be over the curve).
- Edit the material attributes using the Properties view.
Guerilla Render is shipped with some presets of the default shaders.
- Go in the RenderGraph node network.
- Create a preset using the node picker (Ctrl+Space then type the node name you want, like 'carpaint', 'glass', etc..)
.. or select a node in 'Library > rendergraph > presets' - Insert the node in the flow by draging it over a connection (the mouse cursor should be over the curve).
- Edit the material attributes using the Properties view.
The available presets for the Surface shader are :
- CarPaint: a mix of diffuse and metal covered with a coating varnish to be used as industrial paint.
- Glass: a refractive material with glass index of refraction (1.5).
- Matte: a rough material, with very low specular influence.
- Metal: a fully metallic material.
- Plastic: a diffuse and specular material, suitable for plastic surfaces.
- Skin: a SSS and specular material, with color setup to match human skin.
- VarnishWood: a rough material coated with shiny and colored varnish.
- Water: a refractive material with water index of refraction (1.33).
Using Materials
An alternative to shaders are Materials. Materials allow more complex shading networks and allow to control several shading parameters in the same shading network. A Material can be used to set the surface, displacement and volume shaders in the same unit, and set their individual parameters in the same manner as the Shader nodes.
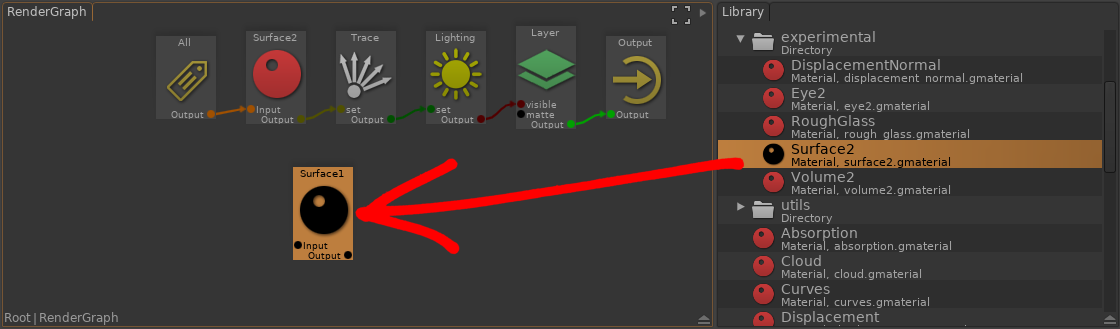
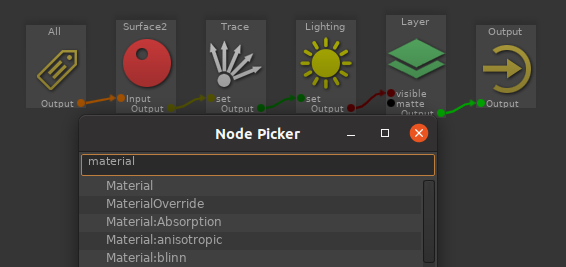
In the RenderGraph, bring the Node Picker (Ctrl+Space) then type 'Material' and select Material:
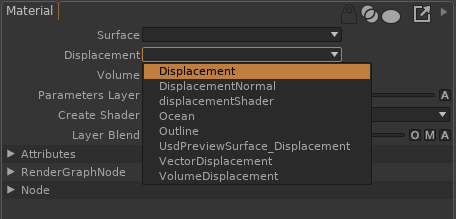
In the Material properties, select the appropriate surface, displacement and volume shaders:
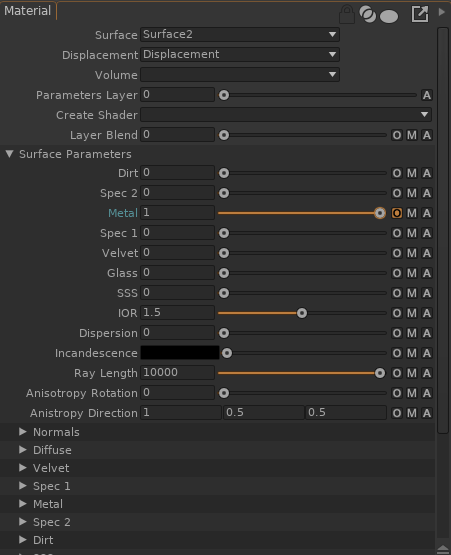
Unfold the Surface/Displacement/Volume Parameters to edit the shaders parameters:
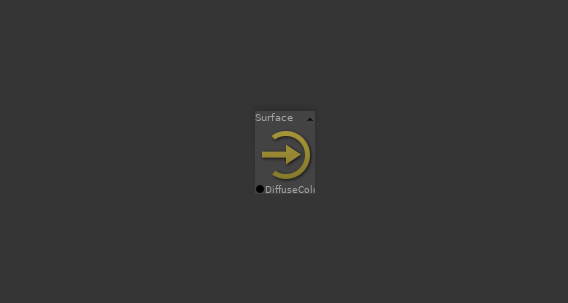
Double-click the Material node to enter its internal shading network. This action creates an empty shader named Shader inside the Material node, with a default Surface node and DiffuseColor output:
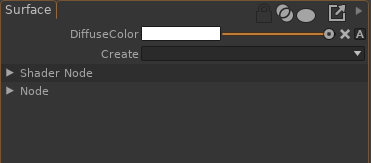
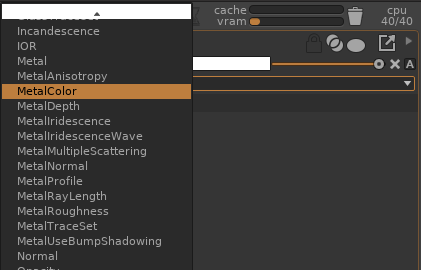
Create new outputs for the Surface output using the Create item in the Surface properties:
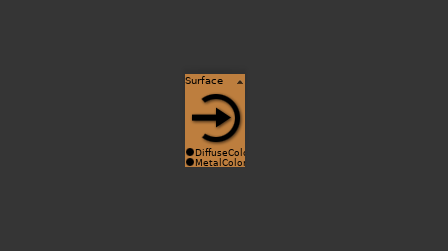
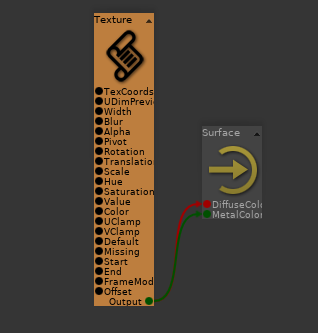
Connect a shading network to both parameters. In the following example, a Texture is connected to both DiffuseColor and MetalColor parameters of the Surface2 shader:
In the RenderGraph, bring the Node Picker (Ctrl+Space) then type 'Output:' and select 'Output: :
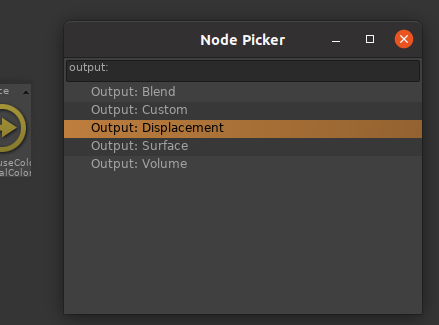
Available output node are Surface, Displacement, Volume, Blend (which allows controlling the layer
blending directly in the shading network, see